

Diploma Mounting Instructions

MVP Frames wishes to congratulate you on your accomplishment. Please follow the steps below to mount and hang your diploma so that you can proudly display and enjoy it for years to come...
- Your diploma must be flat before you begin. If it has been rolled up in a tube, then you will need to slowly unroll it, and then lay it on a flat, clean surface. After it has been unrolled, place a clean towel over top of the diploma for protection and then carefully place a few books over top of the towel for at least 24 hours. Do not mount the diploma until it is completely flat.
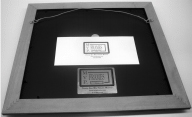
- Once your diploma is ready to mount take the diploma frame, turn it face down, and slowly lay it carefully on top of a soft towel that is placed on a clean, flat surface.
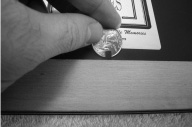
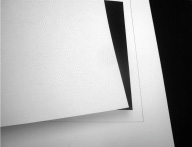
- Now that your diploma frame backside is facing you, slowly bend back the black metal flex tabs that are holding the inside of the diploma in place. Bend the metal flex tabs all the way upright until they touch the wood frame. It may be helpful to use a coin to get underneath the metal flex tabs.
- Using a large coin, slowly remove only the foam backboard from the frame. Make sure that the frame remains flat on the table. Take care to avoid the backboard from touching the metal flex tabs which should be completely upright.
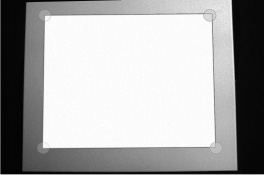
- Place your diploma face down in the designated area marked for your size diploma. This will ensure that the document is centered and equally spaced behind the matte window opening.
- Open the small envelope labeled "Low Tack Adhesive Tabs / Rubber Wall Protectors" which is located in the attached white envelope.
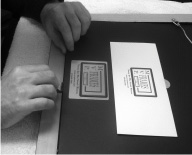
- Peel off the low-tack stickers one by one and carefully place them partially on each of the four corners of the diploma and partially on the matte board. Make sure that after each corner that the diploma remains lined up with the tracer template. There are extra low-tack adhesive stickers if you want to secure the sides of your document.
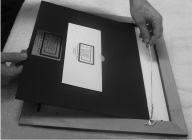
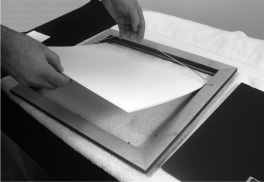
- Now that your diploma is mounted on the matte board, the glass should be cleaned with a soft towel or cloth. Once this is completed, take the matte board and lay it face down on top of the glass (your diploma is still on top of the matte, with the blank side facing you).
- Slowly place the backboard over the matte board. Gently press down to make sure that all four corners of the backboard are secure against the matte board.
- Carefully bend the metal flex tabs down again so that they are pressed against the backboard. Do not press the metal flex tabs down too hard or they will picture the backboard.
- With the frame still flat, remove the rubber wall protectors and place them firmly on the backside bottom two corners. Extra protectors are included but are not needed initially.
- Turn the frame over and clean the outside of the glass with a soft towel or cloth. Do not press down hard on the glass.
- Your frame is now ready to hang using our professional wire hanging system mounted to the back of your diploma frame.
- Before you hammer your nail in, measure the outside dimensions of the frame and then measure the wall surface that you wish to hang it to ensure that you have enough space. Note that your nail will need to be centered at the top part of this space slightly below the top center.
- Once you have hammered your nail in to the wall surface, carefully hand the frame, resting it down on the wire hanger. Before you let go of the frame and step back from the wall, make sure that the frame is secure with the wire resting on top of the nail.
- Step back from the wall to make sure that the frame is level. If it is not level, then repeat step #15 and make adjustments to compensate for the frame level.
Instructions for mounting and hanging your diploma:
Diploma Framing
Your frame is now ready to be proudly displayed for years to come!
-

For more information on our products from our parent company, please visit Varsity Athletic Apparel.
-

-

-

-
© 2009-2012 MVP Frames, Inc. All rights reserved MVP Frames is a Federally Registered Trademark of Varsity Athletic Apparel, Inc.
Tuesday, April 23rd, 2024